Showing posts with label apps. Show all posts

iOS, Android and Windows Phone 7: the facts and my experience [Part 1]

Q4 2010 brought a big milestone to the mobile industry: smartphones outsold PCs for the first time ever. And that's not even taking into account tables and iPods that provide similar functionality. In short, mobile devices - or "post-PC devices", as Steve Jobs calls them - are hot stuff right now.


However, it's easy to get lost and confused by all the devices and even by all the mobile operating systems we can choose from. Apple is certainly leading this new revolution with the iPhone and the iPad, but other software and hardware companies are trying their best to catch up and capture our imagination.

Last Summer I started blogging at Mobitel Tehnik, a blog about mobile technologies, on which my posts (in Slovenian) mainly cover news and tips related to mobile app development. As part of my assignment, I've been using and following the development of some of the recently most popular smart mobile operating systems on the market.

That is why I've decided to sum up some of the thoughts and experiences I've had with various platforms on my blog in two parts: in the first part, I focus on introducing facts and my personal experience with 3 of the most talked about smartphone operating systems: Apple's iOS, Google's Android, and Microsoft's Windows Phone 7. And in part 2, I will try to imagine the potential of using iOS, Android and WP7 mobile devices in classrooms.

Ok, so let's take a look at the facts and my personal experience with each of the three platforms first.

iOS: It's all about beautiful apps


Basic facts: Apple's mobile operating system that runs on iPhones, iPod Touches, iPad and Apple TV - all Apple devices. Launched in June 2007, current version 4.2. Got its application store, the App Store (tied with the iTunes Store), in July 2008 and now features over 350,000 apps.

The experience: Unfortunately, iPhone isn't officially sold in my country (the only blank spot in Europe!), so I've been using iOS on my 2nd generation iPod Touch. Truth be told, I don't really use it as an iPod that much - my primary iPod used mainly for running is the new iPod Nano. The iPod Touch is, however, my mobile device of choice for browsing and apps. I use it to play various casual games like Bejeweled Blitz, Fruit Ninja and Tiny Wings (my current favorites), manage my shopping list with ShopShop, plan my runs with Runner's World SmartCoach app, rate my favorite Movies, and much more.


And I'm just in love with iOS apps! The App Store provides great choice of both free and paid apps, and it's really easy to discover beautiful new apps. It's the kind of store where you buy a $2.99 weather app just because it's sooo pretty.

The magic behind the App Store lies in detailed guidelines and excellent developer tools that make it easy to have good looking apps even if you use just the default UI elements provided by Apple. Yes, a lot of people complain about the strict App Store approval process, but from the user perspective, it pays off to have a store full of quality and well tested apps.

Android: It's all about opportunities and promises


Basic facts: Usually thought as the biggest iOS competitor, developed by Google and other members of the Open Handset Alliance. Launched in October 2008, current version 2.3 Gingerbread, although the majority of users currently still runs version 2.2 Froyo. Android runs on all sorts of smartphone and tablets devices in various price ranges. The devices are made by different manufacturers, which also provide their unique user interfaces (such as HTC Sense, Samsung's TouchWiz etc). The Android application store, Android Market, launched in October 2008 and now features over 250,000 apps.

The experience: Ah, dear Android. The joy and love of the tech crowd. The supposedly "open alternative" to Apple's evil walled-garden. And, more often than not, quite irritating to use.

I've used Android on several HTC devices (Desire, Legend, Wildfire) and the overall look and feel is quite good. The hardware was good, but what annoyed me to no end, was the need to constantly fiddle with settings and other details of the software. And the regular need to reboot, which reminded me of what it was like to own a PC.

All in all, it was usually nothing huge per se, but there was always that tiny little detail that required your attention and sometimes got your head scratching. Like the mystery of why apps that I had never used (e.g. Stocks, Music, News) were always running in the background.

Speaking of apps. Sure, in theory it does sound wonderful that Google lets almost anyone publish apps on the Android Market. But in practice? The Market is flooded with poorly designed apps. And as Android Market works with Google Checkout, which is not supported in my country, I was stuck on using free apps only.

Then, the games... just not comparable to iOS games. And sure, the gaming aspect is supposed to be improved with the next big release - and that is basically what we keep hearing all the time. "The next Android update will kick iPhone's ass!" Anyone else got tired of waiting for the savior?


Ok, I've got to be fair - Android does have a few strong points as well. I loved the integration with Google services, particularly Google Maps. And the WiFi Hotspot app (for tethering), introduced with the Froyo update, was awesome. And oh, I really liked HTC's weather widget on the home screen!

Wondering why I've been using the past tense here? Ah, that's because I've been using Windows Phone 7 as my primary phone OS for a couple of weeks now, and I honestly don't miss Android all that much.

Windows Phone 7: It's all about the simple experience


Basic facts: The new kid on the block, even though it's the successor of the ye olde Windows Mobile platform. Microsoft decided to get a fresh start with Windows Phone 7 and introduced a radically different user interface and no backwards compatibility with previous versions of Windows Mobile. WP7 launched in October 2010 and has yet to receive a major update (expected to be released soon-ish). Like Android, WP7 runs on devices by different manufacturers, but Microsoft sets the hardware requirements for WP7 phones and doesn't allow major modifications of the user interface, so all WP7 phones have a consistent look and feel (unlike Android phones). Its applications store, the Windows Phone Marketplace, launched with the release of the first phones in October 2010 and now features over 8,000 apps.

The experience: This may come as a surprise to those of you that know how much I love using a Mac - I actually enjoy the Windows Phone 7 experience. Yes, me, enjoying a Windows product! Shocking, I know.

But I think Microsoft did the smart thing by dropping the outdated Windows Mobile legacy platform and focused on a fresh, unique mobile experience. It's a mobile OS that tries to help users do what they're supposed to be doing without getting in the way.

Coming from Android, the contrast can be quite stark at first. But after a while, you just sit back and enjoy the ride. No need to worry about turning the GPS on and off manually. If an app, such as Maps, needs it, it will turn it on and then off again when you're done.

The home screen with live tiles makes it easy to see important information on the go, and the OS uses hubs to bundle key content and media together. For instance, the People hub brings together your contacts and their Facebook updates in an attractive panorama view. Plus, it can also sync music, photos and videos with your computer and there's even a Windows Phone 7 Connector for Mac OS X that can sync content from iTunes.


However, it must be noted that WP7 is still a version 1.0 OS, so there are "a few" bugs and oddities that will have to be sorted out. Similarly, the Marketplace is still only a few months old, so the selection of apps isn't that great. For instance, there is no Dropbox or Evernote app, and I miss more apps from Google, particularly Google Maps - WP7, not surprisingly, has Bing Maps integrated and the app just doesn't work as well as Google's.

And just like the Android Market, the Windows Phone Marketplace doesn't allow purchases from my country, so I can't really enjoy any of the cool game titles already available in the application store. You do however get the option to Try out a lot of the paid apps and games, which is a really cool feature.

And the winner is...

One thing is for sure - while similar on paper, iOS, Android and Windows Phone 7 provide quite a different user experience. Which one is best? Well, it really depends on what you're looking for.

iOS is certainly a more solid platform with an amazing selection of apps, which isn't surprising considering it was the first to launch. Android is perfect for geeks that enjoy fiddling with their devices. And WP7 is cute, but needs to grow up a bit more and get more developers interested in making good apps.


For me, iOS is certainly the first choice. It's simple, yet mature enough to provide all the extra goodies (such as tethering). WP7 is also an OS that I could see my grandpa using, as he probably wouldn't miss any of the yet missing apps. And Android is a solid choice for everyone that is bothered by Apple's "closed" system and is looking for variety in hardware, but not something I'd recommend for the average user.

What does it all mean?

So, we have at least three platforms that will be running smartphones and tablets of our future. And we keep hearing the future will be mobile, which also means we can expect the big mobile operating systems to find their way into our classrooms and be used as teaching tools. I therefore invite you to join me in part 2 in a few days to explore which of the 3 platforms might have the biggest potential for learning.

Tango App is Awesome!

I don't usually review apps unless they offer the ability to enhance one's mobile experience.  Tango App is definitely one that enhances mobile experience.  It fills a huge void in the premium smartphone space:  Cross-platform Video Chat over 3G or 4G data network (with ease).

Its what Facetime and Qik should've been.  Simply download Tango on your iPhone 4 or HTC EVO.  Then dial your friends from your address book via Tango.  Tango has no registration process and will tell you if your friend has Tango installed so you can call them.  Video call over 3G data is decent and I had no problem doing so with other iPhone 4 or HTC EVO users.  There are some bugs that needs to be iron'd out, for instance, somehow  my iPhone won't ring when a friend is Tango-calling me even though Tango is running in the background (yet, it works on my friend's iPhone 4) [UPDATE: There is no bug, the app will not alert you if during installation, you've disallowed push notification, albeit they could have explained it better or provided some reference in the settings menu, it can be fixed if you go to your iPhone's SETTINGS>PUSH NOTIFICATION>ENABLE Sound and Display for Tango, thanks to my friend at KRAPPS for the tip!].  In any case, the application is still working pretty good, doing the job that Facetime or Qik should've done.

Tango is an amazing app and I highly recommend it!

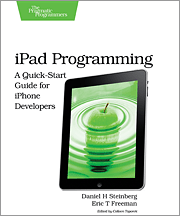
iPad Programming: A Quick-Start Guide for iPhone Programmers

Alright would-be iPad programmers, its time to stop your procrastination and get your app ideas developed.  If you need a little primer, checkout O'reilly's new title "iPad Programming: A Quick-Start Guide for iPhone Programmers".

I, for one, am tired of not finding enough good apps for me to maximize my iPad's value.  For now its just acting like a big iPod Touch.  Hopefully, with more books and programmers interested in developing more apps, some day I will be able to leave my laptop at home and use my iPad in solo.  

Publisher's Description:
It's not an iPhone and it's not a laptop: the iPad is a groundbreaking new device. You need to create true iPad apps to take advantage of all that is possible with the iPad. If you're an experienced iPhone developer, iPad Programming, will show you how to write these outstanding new apps while completely fitting your users' expectation for this device.

Retrevo App for Windows 7 Phone Ready to Roll

Are you one of those hardcore Windows 7 Phone fanboys and just could not wait to get your hands on one?  Retrevo.com, one of my favorite reviews/news site is already on standby with an app build for the the Windows 7 phones.  The app is called RetrevoQ, developed by Retrevo, a Microsoft BizSpark One partner, will feature the same reviews, product comparison and online purchase options as you would find on the desktop version.  Head on over to this photobucket album to check out the rest of the screenshots for yourself.  From the looks of it, it ain't too shabby...  can't wait to see how it will run on Windows 7 phones.

Apps that work together

Android applications can easily be linked together using intents. One example of this involves Shazam, MySpace, and the Amazon MP3 Store. Once Shazam has identified a song, you can also search for the artist's official MySpace profile page or buy the song via via the Amazon MP3 app. Here, the three developers behind these apps talk about how they accomplished this:

To hear more about how the MySpace app for Android was built and lessons learned, watch Matt Kanninen:

Tomasz Zawada of Shazam also talks about his opinions on the Android platform and has some tips for developers building Android apps:

These and the other Android app developer videos can be found here.

Behind the apps: Amazed

This week's developer video features Jason Tomlinson of Hands-On Mobile. He wrote Amazed, an application open sourced in the apps-for-android project. Things Jason mentions in the videos include:

  • Amazed was built primarily to get familiar with the accelerometer. This helped him in his work on Guitar Hero® World Tour Mobile for Android.
  • Using traceview to track down which methods take the most CPU cycles.

This and other Android developer videos can be found here.

Behind the apps: Amazon and imeem

Last week we introduced a couple Android developers who shared how they built their Android apps and gave their insight into Android app development. This week, we have videos of two developers who've built music-related apps.

The first is of Allan Hsu—he wrote imeem's Android app. A couple of things he mentions in his videos:

The second video features Casey Langen—he wrote the Amazon MP3 for Android app. Things he mentions in the videos include:

Check out other Android developer videos here: Android App Developers.

The stories behind the apps

As we mentioned yesterday, the Android Market is now open for developers to upload their applications. I'm pretty excited because Market, along with the availability of the first Android-powered phone and the Android 1.0 SDK, puts the basic pieces of the Android platform into place for developers to create and distribute their apps.

To help developers better understand what's available to them, we've collected stories from some Android application developers. In the videos, you'll hear them talk about how they built their apps, their takes on the Android platform, and also some tips they want to share with other developers. I think they have a lot of insight to share about Android application development, so I hope you'll find these videos useful.

Here are the first two developers in this series:

Jeff Sharkey is an ADC finalist—he built CompareEverywhere.


Jacob Abrams is from Glu Mobile and helped to build their first Android app, Bonsai Blast.


Keep an eye on this blog, our YouTube channel, or the playlist for this series for more of these videos in the coming weeks.

Panoramio

The Panoramio web site has a great collection of photos from all over the world, and they also have a very convenient web API. I thought it would be a lot of fun to use Android to access this content while you are out walking around – and especially to have Android find interesting photos based on your current location. The resulting open source application is now available in the apps-for-android project.

The application starts by showing your current location in a custom MapView. You can pan and zoom this map to choose the area you want to search.

Once you have selected a search area, the application downloads thumbnails of the most popular photos taken within that area:

You can tap on an item to see more details.

From here you can use the menu to find more pictures by the same photographer or to see the original photo on the Panoramio site. My two favorite features, though, help you find the location of the photo in the real world. You can show the location on the map along with your current location:

Or, you can bring up a radar view that uses the compass and GPS to show you the location of the photo in relation to your own location:

I thought that other applications might want to use the radar view for their own purposes ("find me the nearest taqueria"), so I split that into its own package. You can find the source for that in the Radar project. Of course, you don't need the source in order to use this feature. Because of Android's component architecture, all you need to do us use an Intent:

Intent i = new Intent("com.google.android.radar.SHOW_RADAR");

i.putExtra("latitude", 37.422f);

i.putExtra("longitude", -122.084f);

startActivity(i);

The code for these applications is not very long, but they are a good example of how to use a number of Android's location APIs:

Using WebViews

I've written a small application called WebViewDemo that shows how you can add web content to your application. You can find it in the apps-for-android project. This application demonstrates how you can embed a WebView into an activity and also how you can have two way communication between your application and the web content.

A WebView uses the same rendering and JavaScript engine as the browser, but it runs under the control of your application. The WebView can be full screen or you can mix it with other Views. The content for your WebView can come from anywhere. The WebView can download content from the web, or it can come from local files stored in your assets directory. The content can even be dynamically generated by your application code. For this example, the HTML comes from a local file called demo.html.

This application does not do very much: when you click on the android, he raises his arm.

This could, of course, easily be accomplished with a little bit of JavaScript. Instead, though, WebViewDemo takes a slightly more complicated path to illustrate two very powerful features of WebView.

First, JavaScript running inside the WebView can call out to code in your Activity. You can use this to have your JavaScript trigger actions like starting a new activity, or it can be used to fetch data from a database or ContentProvider. The API for this is very simple: just call the addJavascriptInterface method on your WebView. You pass an object whose methods you want to expose to JavaScript and the name to use when making calls. You can see the exact syntax in WebViewDemo.java. Here we are making our DemoJavascriptInterface object available to JavaScript where it will be called "window.demo".

Second, your Activity can invoke JavaScript methods. All you have to do is call the loadUrl method with the appropriate JavaScript call:

mWebView.loadUrl("javascript:wave()");

Our WebViewDemo uses both techniques: when you click on the android, it calls out to the activity, which then turns around and calls back into the JavaScript. WebViews are very powerful, and they may be a valuable tool to help you build your application – especially if you already have a lot of HTML content. As it happens, we've used exactly this approach in some of the applications we've written.

Divide and Conquer

Years ago I was addicted to a simple game that I played on my then state-of-the-art Pentium-75. In this game, balls would bounce around, and I would try to partition them into small enough spaces so that I could go to the next level where more and more balls would be added. As of a couple of months ago, for the life of me, I couldn't remember the name of this game. So when I sat down to write an application for Android in my 20% time, I thought, why not try to recreate something similar? After completing most of the game and showing it to some of my friends at work, one of them said, "Oh, this reminds me of JezzBall!" Eureka! If working on this game does nothing more than reveal the name of one of the favorite games of my youth, I'll call it a success, but in the meantime, I'm happy to announce that the source of this application, named Divide and Conquer, is now available on apps-for-android.


The game starts with instructions:


and begins simply enough with one ball bouncing around. You drag your finger in a horizontal or vertical gesture on the screen to initiate a line that extends until it reaches the edges:


In each level, once you've shaved off 80% of the original area, you move to the next level. Here's a screen shot of level 6:


If a ball hits a line in progress, you lose a life:


Once you are out of lives, it is game over:


While this game isn't going to win any awards for cutting edge graphics, it demonstrates use of several Android features and APIs:


  • custom drawing and animation
  • touch input based gesture detection

  • overriding the default behavior of the back key in some situations (to pause the game)

  • creating custom Dialogs

  • configuring an application to be full screen with no title or status bar
  • use of the preferences framework

  • use of the vibrator API

DivideAndConquerView is a custom View that implements its own onDraw method using the Canvas methods, and gesture detection using onTouchEvent and a helper class DirectionPoint. It keeps track of the state of the game using BallEngine, and reports relevant events back to the main activity of the application, which, in turn, keeps track of and controls the state of the game. The application is configured to be full screen in its AndroidManifest.xml file.

Android Photostream

I'm pleased to announce that a new open source sample application—called Photostream—has been added to the apps-for-android project. Photostream is a simple photos browser and viewer for Flickr. All you need to use it is a Flickr screen name or user name (the application offers a default user name if you just want to try it.)


This application serves as an illustrative example of several Android features and APIs:


  • Activity aliases

  • Adding custom shortcuts to Home

  • Adding a new wallpaper chooser to the system

  • Custom layouts

  • Custom XML attributes

  • Use of themes

  • Use of styles

  • Use of text colors

  • Use of <include>

  • Use of bitmap and layer drawables from XML

  • Use of HttpClient

  • Proper interaction between background threads and the UI thread

  • Efficient display rotation (using the new onRetainNonConfigurationInstance() API)

  • Animations and layout animations

  • Cropping an image

  • Image manipulation


My favorite feature is the ability to add a new shortcut type in Home, to create a shortcut to any Flickr account. The shortcut shows a custom icon, downloaded from the Flickr user profile:


If you plan on reusing the source code to access Flickr in your own application, you should modify the Flickr.java file to replace the existing API key with your own. The application source code also contains a very handy class called UserTask.java. This class is designed to help you easily write background operations that interact with the UI thread.

Presenting the Winners of the Android Developer Challenge I

Since we started the first Android Developer Challenge late last year, we all have been eager to see who the winners of $275,000 and $100,000 would be. All 50 applications that emerged from Round 1 of ADC I showed great promise, and these teams have been working intensely for the past several months to polish their apps for the final round.

Similar to round 1 we sent laptops preconfigured with the judging environment, emulator, and all entries to each of our seven judges. In this round, each judge reviewed all 50 applications, took collaborative notes and gave initial scores. Then, all judges met together over conference calls to discuss and debate these applications, finally coming to consensus on which applications should receive $275,000 and which should receive $100,000.

We're pleased to present all of the winners and finalists in our detailed ADC gallery. Peruse and enjoy — there are awesome applications and unique uses of the Android platform. We would like to congratulate the winners and thank all the entrants for their hard work!

Android Market: a user-driven content distribution system

When we talk to developers, a common topic is the challenge of getting applications in the hands of users. That's why today I'm happy to share early details of Android Market—an open content distribution system that will help end users find, purchase, download and install various types of content on their Android-powered devices. The concept is simple: leverage Google's expertise in infrastructure, search and relevance to connect users with content created by developers like you.

Developers will be able to make their content available on an open service hosted by Google that features a feedback and rating system similar to YouTube. We chose the term "market" rather than "store" because we feel that developers should have an open and unobstructed environment to make their content available. Similar to YouTube, content can debut in the marketplace after only three simple steps: register as a merchant, upload and describe your content and publish it. We also intend to provide developers with a useful dashboard and analytics to help drive their business and ultimately improve their offerings.

I also wanted to share some early details to help with planning your efforts so that you can be ready as our partners release the first Android-powered handsets. Developers can expect the first handsets to be enabled with a beta version of Android Market. Some decisions are still being made, but at a minimum you can expect support for free (unpaid) applications. Soon after launch an update will be provided that supports download of paid content and more features such as versioning, multiple device profile support, analytics, etc. Below are some screenshots that illustrate some of the security features and workflow.

With the addition of a marketplace, the Android ecosystem is becoming even more robust. I am incredibly energized by the support and amazing content I've seen so far. We will share more details as they are available and I look forward to working with many of you in the coming months.

AndroidGlobalTime

We are pleased to announce that a new open source sample application—called AndroidGlobalTime — has been added to the apps-for-android project.


It's a 3D world clock developed by an engineer at Google and may serve as an illustrative example of how to use the OpenGL ES APIs in your Android applications.


Just a quick word on how to use AndroidGlobalTime. When you launch it, you'll see a spinning globe showing day and night regions. Pressing the space bar will overlay an analog clock with the time corresponding to location you're currently examining. The arrow keys allow you to spin the Earth and traverse through different time-zones while the clock is displayed. Pressing the center key in the emulator toggles between a 3D and 2D view of the earth. Pressing the L key will turn the city lights on or off. You can also zoom-out by pressing 2 and zoom-in by pressing 8.

Hope you find this helpful!

WikiNotes for Android: Routing Intents

In the last article, we talked about using Linkify to turn wiki words (those that match a regular expression we defined) into a content: URI and defining a path to data that matched a note belonging to that wiki word. As an example, a matching word like ToDoList would be turned into a content: URI like content://com.google.android.wikinotes.db.wikinotes/wikinotes/ToDoList and then acted upon using the VIEW action from the Linkify class.


This article will examine how the Android operating system takes this combination of VIEW action and content: URI and finds the correct activity to fire in order to do something with the data. It will also explain how the other default links created by Linkify, like web URLs and telephone numbers, also result in the correct activity to handle that data type being fired. Finally, this article will start to examine the custom ContentProvider that has been created to handle WikiNotes data. The full description of the ContentProvider and what it does will span a couple more articles as well, because there is a lot to cover.


The Linkify-calls-intent Workflow


At a high level, the steps for Linkify to invoke an intent and for the resulting activity (if any) to handle it looks like this:


  1. Linkify is invoked on a TextView to turn matching text patterns into Intent links.

  2. Linkify takes over monitoring for those Intent links being selected by the user.

  3. When the user selects a link, Linkify calls the VIEW action using the content: URI associated with the link.

  4. Android takes the content: URI that represents the data, and looks for a ContentProvider registered in the system that matches the URI.

  5. If a match is found, Android queries the ContentProvider using the URI, and asks what MIME type the data that will be returned from the URI is.

  6. Android then looks for an activity registered in the system with an intent-filter that matches both the VIEW action, and the MIME type for the data represented by the content: URI.

  7. Assuming a match is found, Linkify then invokes the intent for the URI, at which point the activity takes over, and is handed the content: URI.

  8. The activity can then use the URI to retrieve the data and act on it.


If this sounds complicated, it really is a simpler process than it sounds, and it is quite lightweight as well. Perhaps a more understandable statement about how it works might be:


Linkify is used to turn matching text into hot-links. When the user selects a hot-link, Android takes the data locator represented by the hot-link and looks for a data handler for that data locator. If it finds one, it asks for what type of data is returned for that locator. It then looks for something registered with the system that handles that type of data for the VIEW action, and starts it, including the data locator in the request.


The real key here is the MIME type. MIME stands for Multipurpose Internet Mail Extensions - a standard for sending attachments over email. The MIME type (which is the part Android uses) is a way of describing certain kinds of data. That type is then used to look for an Activity that can do something with that data type. In this way, ContentProviders and Activities (or other IntentReceivers) are decoupled, meaning that a given Content URI might have a different ContentProvider to handle it, but could still use the same MIME type meaning that the same activity could be called upon to handle the resulting data.


Linkify on a Wiki Word


Using the above workflow, let's take a look at exactly how the process works in WikiNotes for Android:


First, Linkify is used to turn text matching the wiki word regular expression into a link that provides a Content URI for that wiki word, for example content://com.google.android.wikinotes.db.wikinotes/wikinotes/ToDoList.


When the user clicks on the wiki word link, Linkify invokes the VIEW action on the Content URI. At this point, the Android system takes over getting the Intent request to the correct activity.


Next, Android looks for a ContentProvider that has been registered with the system to handle URIs matching our Content URI format.


In our case, we have a definition inside our application in the AndroidManifest.xml file that reads:


<provider name="com.google.android.wikinotes.db.WikiNotesProvider" 
android:authorities="com.google.android.wikinotes.db.wikinotes" />


This establishes that we have a ContentProvider defined in our application that provides the "root authority": com.google.android.wikinotes.db.wikinotes. This is the first part of the Content URI that we create for a wiki word link. Root Authority is just another way of thinking about a descriptor that is registered with Android to allow requests for certain URLs to be routed to the correct class.


So, the whole definition is that a class called com.google.android.wikinotes.db.WikiNotesProvider is registered with the system as able to handle the com.google.android.wikinotes.db.wikinotes root authority (i.e. URIs starting with that identifier).


From here, Android takes the rest of the URI and present it to that ContentProvider. If you look at the WikiNotesProvider class and scroll to the very bottom - the static block there, you can see the pattern definitions to match the rest of the URL.


In particular, take a look at the two lines:


URI_MATCHER.addURI(WikiNote.WIKINOTES_AUTHORITY, "wikinotes", NOTES);
URI_MATCHER.addURI(WikiNote.WIKINOTES_AUTHORITY, "wikinotes/*", NOTE_NAME);


These are the definitions of URIs that our ContentProvider recognizes and can handle. The first recognizes a full URI of content://com.google.android.wikinotes.db.wikinotes/wikinotes and associates that with a constant called NOTES. This is used elsewhere in the ContentProvider to provide a list of all of the wiki notes in the database when the URI is requested.


The second line uses a wildcard - '*' - to match a request of the form that Linkify will create, e.g. content://com.google.android.wikinotes.db.wikinotes/wikinotes/ToDoList. In this example, the * matches the ToDoList part of the URI and is available to the handler of the request, so that it can fish out the matching note for ToDoList and return it as the data. This also associates that match with a constant called NOTE_NAME, which again is used as an identifier elsewhere in the ContentProvider.


The other matches in this static block are related to forms of searching that have been implemented in the WikiNotes for Android application, and will be covered in later articles. Likewise, how the data is obtained from this matching pattern will be the subject of the next article.


For right now we are concerned with the MIME type for the URI. This is defined in the getType() method also in the WikiNotesProvider class (about half way through the file). Take a quick look at this. The key parts for now are:


case NOTES:
return "vnd.android.cursor.dir/vnd.google.wikinote";


and

case NOTE_NAME:
return "vnd.android.cursor.item/vnd.google.wikinote";


These are the same constant names we defined in our pattern matchers. In the first case, that of the all notes URI, the MIME type returned is vnd.android.cursor.dir/vnd.google.wikinote which is like saying an Android list (dir) of Google wiki notes (the vnd bit is MIME speak for "vendor specific definition"). Likewise, in the case of a NOTE_NAME match, the MIME type returned is vnd.android.cursor.item/vnd.google.wikinote which is like saying an Android item of Google wiki notes.


Note that if you define your own MIME data types like this, the vnd.android.cursor.dir and vnd.android.cursor.item categories should be retained, since they have meaning to the Android system, but the actual item types should be changed to reflect your particular data type.


So far Android has been able to find a ContentProvider that handles the Content URI supplied by the Linkify Intent call, and has queried the ContentProvider to find out the MIME types for that URI. The final step is to find an activity that can handle the VIEW action for that MIME type. Take a look in the the AndroidManifest.xml file again. Inside the WikiNotes activity definition, you will see:


<intent-filter>
<action name="android.intent.action.VIEW"/>
<category name="android.intent.category.DEFAULT"/>
<category name="android.intent.category.BROWSABLE"/>
<data mimetype="vnd.android.cursor.item/vnd.google.wikinote"/>
</intent-filter>


This is the correct combination of matches for the VIEW action on a WikiNote type that is requested from the LINKIFY class. The DEFAULT category indicates that the WikiNotes activity should be treated as a default handler (a primary choice) for this kind of data, and the BROWSABLE category means it can be invoked from a "browser", in this case the marked-up Linkified text.


Using this information, Android can match up the VIEW action request for the WikiNotes data type with the WikiNotes activity, and can then use the WikiNotes activity to handle the request.


Why do it like this?


It's quite a trip through the system, and there is a lot to absorb here, but this is one of the main reasons I wanted to write WikiNotes in the first place. If you follow and understand the steps here, you'll have a good grasp of the whole Intents mechanism in Android, and how it helps loosely coupled activities cooperate to get things done.


In this case, we could have found another way to detect wiki words based on a regular expression, and maybe written our own handler to intercept clicks within the TextView and dig out the right data and display it. This would seem to accomplish the same functionality just as easily as using intents, so what is the advantage to using the full Intents mechanism?


In fact there are several advantages:


The most obvious is that because we are using the standard Intent based approach, we are not limited to just linking and navigating to other wiki notes. We get similar behavior to a number of other data types as well. For example, a telephone number or web URL in a wiki note will be marked up by Linkify, and using this same mechanism (VIEW action on the linked data type) the browser or dialer activities will be automatically fired.


It also means that each operation on a wiki note can be treated as a separate life cycle by our activity. We are not dealing with swapping data in and out of an existing activity - each activity works on a particular wiki note and that's all you have to worry about.


Another advantage is that we now have a public activity to handle VIEW actions in WikiNotes no matter where the request comes from. Another application could request to view a wiki note (perhaps without even knowing what kind of data it is) and our activity could start up and handle it.


The backstack is automatically maintained for you too. As you forward navigate through WikiNotes, Android maintains the history of notes visited, and so when you hit the back button you go back to the last note you were on. All this is free because we rely on the Android intents mechanism.


Finally, if you run WikiNotes for Android and then start DDMS to take a look at the Activity threads in the WikiNotes application while it is running, you can see that despite what you might think, letting Android manage the navigation is very efficient. Create a few linked notes, as many links deep as you like, and then follow them. If you follow links hundreds of notes deep, you will still only see a handful of WikiNotes activities. Android is managing the activities, closing the older ones as necessary and using the life cycle to swap data in and out.


Next Time


This was a long article, but necessarily so. It demonstrates the importance of the Intents mechanism and to reinforce the notion that it should be used whenever possible for forward navigation, even within a single application. Illustrating this is one of the primary reasons I wrote WikiNotes for Android in the first place.


In the next article we will look deeper into the ContentProvider and examine how it turns a Content URI into a row (or several rows) of data that can be used by an activity.

Linkify your Text!

This is the first in a series of technical articles about WikiNotes for Android, part of the Apps for Android project.


This article covers the use of Linkify to turn ordinary text views into richer link-oriented content that causes Android intents to fire when a link is selected.


Linkify: The Linkify class in the SDK is perfect for creating a wiki note pad. This class lets you specify a regular expression to match, and a scheme to prepend. The scheme is a string that, when the matched text is added, forms a Content URI to allow the correct data to be looked up.


For example, in our case we want to look for a regular expression match for a WikiWord (that is, a word with camel case and no spaces). Linkify can then turn this into a Content URI - something like >content://com.google.android.wikinotes.db.wikinotes/wikinotes/WikiWord which can then be used to locate the correct wiki page from a content provider.


As a bonus, the Linkify class also defines several default matches, in particular it is able to turn web URLs, email addresses and telephone numbers into active links which fire Android intents automatically.


Linkify can be passed any TextView in your application, and will take care of creating the links and enabling their "clickability" for you.


Default Linkify: Using the set of default active link options is very straightforward - simply pass it a handle to a TextView with content in it, and the Linkify.ALL flag:


TextView noteView = (TextView) findViewById(R.id.noteview);
noteView.setText(someContent);
Linkify.addLinks(noteView, Linkify.ALL);


and that's it. The Linkify.ALL flag applies all of the predefined link actions, and the TextView will be immediately updated with a set of active links which, if you select them, fire default intents for the actions (e.g. a web URL will start the browser with that URL, a telephone number will bring up the phone dialer with that number ready to call, etc.).


Custom Linkify: So what about our WikiWord? There is no pre-defined action for that, so it needs to be defined and associated with a scheme.


The first task is to defined a regular expression that matches the kind of WikiWords we want to find. The regex in this case is:


\b[A-Z]+[a-z0-9]+[A-Z][A-Za-z0-9]+\b


Obvious no? Well actually this is equivalent to the following description: "Starting with a word boundary (the \b) find at least one upper case letter, followed by at least one lower case letter or a numeric digit, followed by another upper case letter, and then any mix of upper case, lower case or numeric until the next word boundary (the final \b)". Regular expressions are not very pretty, but they are an extremely concise and accurate way of specifying a search pattern.


We also need to tell Linkify what to do with a match to the WikiWord. Linkify will automatically append whatever is matched to a scheme that is supplied to it, so for the sake of argument let's assume we have a ContentProvider that matches the following content URI:


content://com.google.android.wikinotes.db.wikinotes/wikinotes/WikiWord


The WikiWord part will be appended by Linkify when it finds a match, so we just need the part before that as our scheme.


Now that we have these two things, we use Linkify to connect them up:


Pattern wikiWordMatcher = Pattern.compile("\\b[A-Z]+[a-z0-9]+[A-Z][A-Za-z0-9]+\\b");
String wikiViewURL = "content://com.google.android.wikinotes.db.wikinotes/wikinotes/";
Linkify.addLinks(noteView, wikiWordMatcher, wikiViewURL);


Note that the \b's had to be escaped with double backslashes for the Java Pattern.compile line.


Linkify can be used multiple times on the same view to add more links, so using this after the Default Linkify call means that the existing active links will be maintained and the new WikiWords will be added. You could define more Linkify actions and keep applying them to the same TextView if you wanted to.


Now, if we have a WikiWord in the TextView, let's say MyToDoList, Linkify will turn it into an active link with the content URI:


content://com.google.android.wikinotes.db.wikinotes/wikinotes/MyToDoList


and if you click on it, Android will fire the default intent for that content URI.


For this to all work, you will need a ContentProvider that understands that Content URI, and you will need a default activity capable of doing something with the resulting data. I plan to cover these in future blog entries (and soon). In fact, the whole Wiki Note Pad application is currently undergoing some clean up and review, and will then hopefully be released as a sample application.

Android Developer Challenge Deadline Approaching Quickly

The Android Developer Challenge is proceeding nicely. We're excited about the interest people have shown so far and have enjoyed talking to everyone working on new Android Apps.

As a quick reminder, the first phase of the challenge will be ending on April 14. In the Android Developer Challenge I, the 50 most promising entries received by April 14 will each receive a $25,000 award to fund further development. Those selected will then be eligible for even greater recognition via ten $275,000 awards and ten $100,000 awards.

Keep working on your applications, and be sure to post in the forums if you have any questions!

A Maze of Twisty Little Passages


The end of last week was Thanksgiving in the US, the tradition is to be with family, eat too much food and watch football (not necessarily in that order).


Apparently some folks took the chance to work on Android projects too. We are highlighting a few of the projects that caught our eye.


One of the coming of age rituals of any new platform is the porting of the Z-machine – the interpreter used in the Zork series of games from Infocom. Now Android has the Z-machine thanks to sussman and mariusm. The project, called Twisty, is available on Google code hosting. Thanks for the lost productivity you guys.


Testing is also a hot topic on our Google groups. While JUnit is bundled with the Android SDK to make it possible to do unit testing, there are many other kinds of testing, like automated acceptance testing. Positron builds on the Android instrumentation features from the SDK to make automated acceptance testing of Android applications possible. The author, phil.h.smith, has a pretty good introduction on how to use Positron as well.


Plugins for other IDEs are another favorite on the Android Google groups. While there are only rumblings about a NetBeans plugin at present, the idea-android project already has an early release for IntelliJ IDEA thanks to aefimov.box and intelliyole.


Dion Almaer also picked up on a crossover GWT/Android project which looks pretty amazing too. Chronoscope is an open source charting and visualization library written in GWT. The team were able to take the library, and with 8 hours of playing with Android, had a port to the Android platform.


Of course, there are many more Android projects springing up all the time, as a search of the android label on Google code hosting will demonstrate. It's great to see all this activity just a couple of weeks after the SDK was released.

A Stitch in Time


Background: While developing my first useful (though small) application for Android, which was a port of an existing utility I use when podcasting, I needed a way of updating a clock displayed on the UI at regular intervals, but in a lightweight and CPU efficient way.


Problem: In the original application I used java.util.Timer to update the clock, but that class is not such a good choice on Android. Using a Timer introduces a new thread into the application for a relatively minor reason. Thinking in terms of mobile applications often means re-considering choices that you might make differently for a desktop application with relatively richer resources at its disposal. We would like to find a more efficient way of updating that clock.


The Application: The rest of the story of porting the application will be detailed in future blog entries, but if you are interested in the application in question and the construction of it, you can read about it in a not-so-recent Developer.com article about using Matisse (a GUI builder for Swing). The original application is a Java Swing and SE application. It is like a stopwatch with a lap timer that we use when recording podcasts; when you start the recording, you start the stopwatch. Then for every mistake that someone makes, you hit the flub button. At the end you can save out the bookmarked mistakes which can be loaded into the wonderful Audacity audio editor as a labels track. You can then see where all of the mistakes are in the recording and edit them out.


The article describing it is: http://www.developer.com/java/ent/print.php/3589961


In the original version, the timer code looked like this:


class UpdateTimeTask extends TimerTask {
public void run() {
long millis = System.currentTimeMillis() - startTime;
int seconds = (int) (millis / 1000);
int minutes = seconds / 60;
seconds = seconds % 60;

timeLabel.setText(String.format("%d:%02d", minutes, seconds));
}
}

And in the event listener to start this update, the following Timer() instance is used:

if(startTime == 0L) {
startTime = evt.getWhen();
timer = new Timer();
timer.schedule(new UpdateTimeTask(), 100, 200);
}


In particular, note the 100, 200 parameters. The first parameter means wait 100 ms before running the clock update task the first time. The second means repeat every 200ms after that, until stopped. 200 ms should not be too noticeable if the second resolution happens to fall close to or on the update. If the resolution was a second, you could find the clock sometimes not updating for close to 2 seconds, or possibly skipping a second in the counting, it would look odd).


When I ported the application to use the Android SDKs, this code actually compiled in Eclipse, but failed with a runtime error because the Timer() class was not available at runtime (fortunately, this was easy to figure out from the error messages). On a related note, the String.format method was also not available, so the eventual solution uses a quick hack to format the seconds nicely as you will see.


Fortunately, the role of Timer can be replaced by the android.os.Handler class, with a few tweaks. To set it up from an event listener:


private Handler mHandler = new Handler();

...

OnClickListener mStartListener = new OnClickListener() {
public void onClick(View v) {
if (mStartTime == 0L) {
mStartTime = System.currentTimeMillis();
mHandler.removeCallbacks(mUpdateTimeTask);
mHandler.postDelayed(mUpdateTimeTask, 100);
}
}
};


A couple of things to take note of here. First, the event doesn't have a .getWhen() method on it, which we handily used to set the start time for the timer. Instead, we grab the System.currentTimeMillis(). Also, the Handler.postDelayed() method only takes one time parameter, it doesn't have a "repeating" field. In this case we are saying to the Handler "call mUpdateTimeTask() after 100ms", a sort of fire and forget one time shot. We also remove any existing callbacks to the handler before adding the new handler, to make absolutely sure we don't get more callback events than we want.


But we want it to repeat, until we tell it to stop. To do this, just put another postDelayed at the tail of the mUpdateTimeTask run() method. Note also that Handler requires an implementation of Runnable, so we change mUpdateTimeTask to implement that rather than extending TimerTask. The new clock updater, with all these changes, looks like this:


private Runnable mUpdateTimeTask = new Runnable() {
public void run() {
final long start = mStartTime;
long millis = SystemClock.uptimeMillis() - start;
int seconds = (int) (millis / 1000);
int minutes = seconds / 60;
seconds = seconds % 60;

if (seconds < 10) {
mTimeLabel.setText("" + minutes + ":0" + seconds);
} else {
mTimeLabel.setText("" + minutes + ":" + seconds);
}

mHandler.postAtTime(this,
start + (((minutes * 60) + seconds + 1) * 1000));
}
};


and can be defined as a class member field.


The if statement is just a way to make sure the label is set to 10:06 instead of 10:6 when the seconds modulo 60 are less than 10 (hopefully String.format() will eventually be available). At the end of the clock update, the task sets up another call to itself from the Handler, but instead of a hand-wavy 200ms before the update, we can schedule it to happen at a particular wall-clock time — the line: start + (((minutes * 60) + seconds + 1) * 1000) does this.


All we need now is a way to stop the timer when the stop button is pressed. Another button listener defined like this:


OnClickListener mStopListener = new OnClickListener() {
public void onClick(View v) {
mHandler.removeCallbacks(mUpdateTimeTask);
}
};


will make sure that the next callback is removed when the stop button is pressed, thus interrupting the tail iteration.


Handler is actually a better choice than Timer for another reason too. The Handler runs the update code as a part of your main thread, avoiding the overhead of a second thread and also making for easy access to the View hierarchy used for the user interface. Just remember to keep such tasks small and light to avoid slowing down the user experience.


So that's it for the first of what will be a series of Android tips. Hopefully this will save you a little head scratching on what will probably be a fairly common thing to want to do (i.e. make something happen or update at regular intervals in a lightweight way in your application). There is plenty of more material from my experience of porting this very simple application which will be covered in some of the future "tips" articles. There are some other great tips being discussed as well as an opportunity ask questions at the Android Developers Discussion Group.